Vegan Pavlova
Recipe Ingredients
How to Prepare:
Preheat the oven to 130°C/120°C fan/Gas Mark ½. Draw a 9” circle on a piece of grease-proof and place on a large baking tray.
Drain the chickpea water out of the can and place in a free standing mixer with the whisk attachment. Begin to whisk the chickpea water until it is frothy, add the Cream of Tartar and continue to whisk on a high speed until soft peaks form. Gradually add the sugar a spoonful at a time ensuring the sugar is mixed into the meringue after each addition. Continue to whisk the meringue until it is thick and glossy and there are no sugar pieces in the meringue – to test this rub a small amount of meringue between your thumb and finger and you should not be able to feel any sugar grains, if you can continue to whisk. The meringue will need to be whisked for 10 minutes or longer.
Once the meringue is whipped, add the Vanilla Extract and whisk through. Pour the meringue mixture onto your prepared tray into the centre of the circle you have drawn. Using a spatula push the meringue to cover the circle you have drawn and create an even layer of meringue.
Place the meringue disc in the oven to bake for 1:15 hours and then turn off the oven and leave to cool in the oven for 1-2 hours. If you are not using it straight away store in an airtight container.
Ensure the can of coconut milk has been in the fridge the night before using it, it should have separated and you should have a nice thick layer of cream at the top of the can. Scoop the cream out of the can and place in a large bowl. leave any remaining coconut water in the can (use might need this later).
Whisk the coconut cream using an hand held electric whisk until it has thickened and soft peaks form. Add the Cocoa Powder, icing sugar and Vanilla Paste and whisk again until all combined. Store the cream in the fridge until required this will help keep it thickened – you can make the cream the day before it is required if you are short on time.
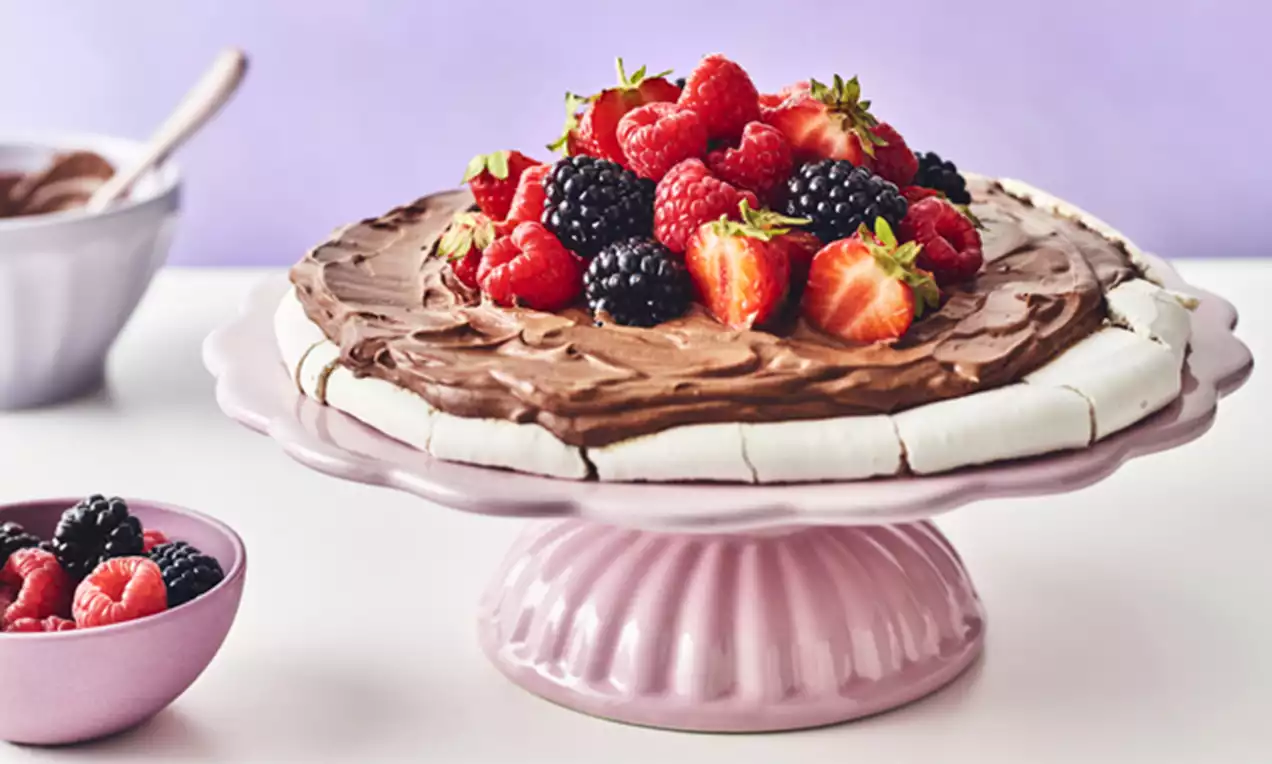
Just before you are ready to serve, assemble the pavlova. Place the meringue on a serving plate. Place the cream on top and smooth to cover the meringue leaving a small gap at the edges. Arrange the mixed berries on top and the cream and your Vegan Pavlova is ready to serve and enjoy!
RELATED RECIPES
More delicious ideas for you
Dessert and After Dinner Recipes
Ultimate Fruity Ombre Cheesecake
Dessert and After Dinner Recipes
Wild Berry Pavlova
Dessert and After Dinner Recipes