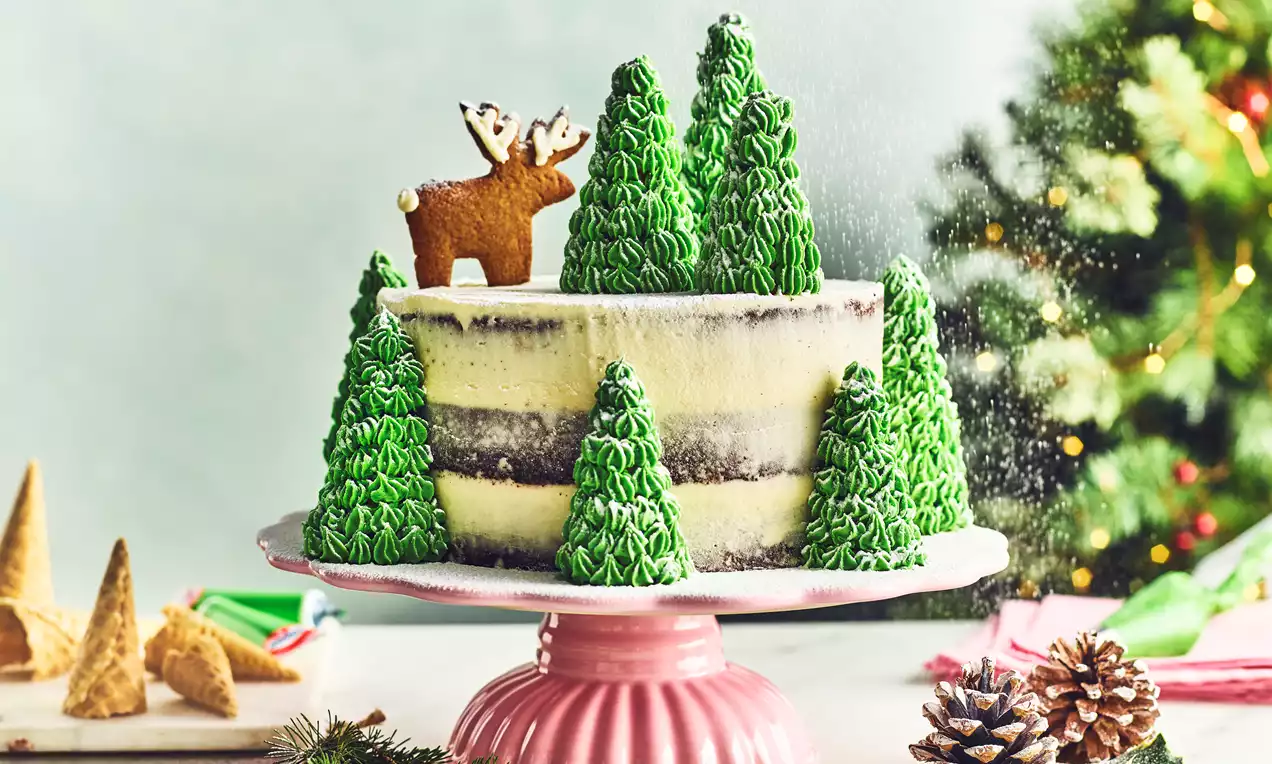
Black Forest Christmas Cake
Recipe Ingredients
How to Prepare:
Preheat the oven to 180°C (160°C Fan/ Gas Mark 5). Grease and line 3 x 8 inch round cake tins. Melt the Chocolate in the microwave, heat for 30 seconds and then stir, heat in 10 second bursts stir after each burst until the chocolate is melted. Leave the chocolate to one side to cool.
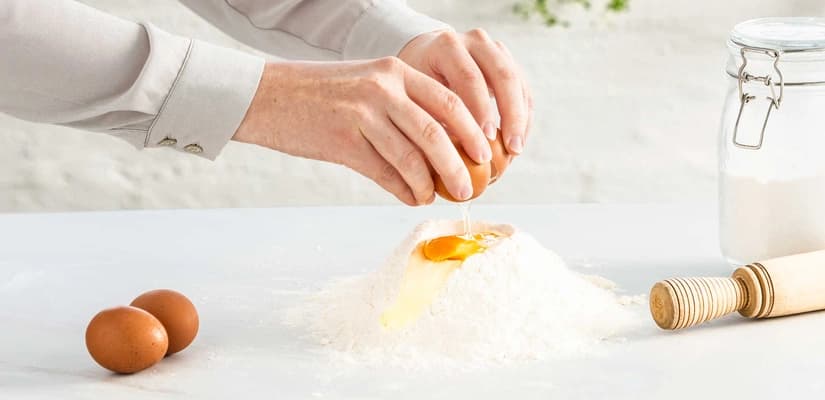
Place the sugar and margarine in a bowl and cream together until smooth and light in colour. Add the beaten eggs and Vanilla Paste and mix together until the egg is combined and you have smooth mixture – if the mixture begins to curdle add a spoonful of flour.
Sieve in the flour, Baking Powder and Cocoa Powder and gently fold into the mixture until all the flour is combined. Finally pour in the cooled chocolate and dried cherries and mix through the batter.
Divide the batter between your two prepared cake tins and smooth the tops. Place in the oven and bake for 30-35 minutes until risen and a skewer inserted into the centre come out clean. Leave the cakes to cool in the tins for 15 minutes and then transfer to a wire rack to cool completely.
Melt the White Chocolate in the microwave, heat for 30 seconds and then stir, heat in 10 second bursts stir after each burst until the chocolate is melted. Leave the chocolate to one side to cool.
Place the butter into a free standing mixer and add a third of the icing sugar. And mix until the icing sugar is combined, add the next third of icing sugar and repeat until all the icing sugar has been added and is combined.
Add the White Chocolate and beat the buttercream until it is light and fluffy in texture, add the milk if you think the buttercream is too stiff.
Divide the buttercream equally into 2 bowls.
Firstly level off each layer of sponge. Take the first layer of sponge and place on your cake board or serving plate. Take one bowl of buttercream this will be used to fill and crumb coat your cake. Take a third of the buttercream out of bowl and place in a different bowl, add the Red Colour Gel and mix through until the colour is evenly distributed. Place the red buttercream in a piping bag and place half of the white buttercream in another piping bag. Cut the end of each piping bag to create a 1 cm hole. Starting in the centre of the cake layer pipe a small ring of red buttercream then pipe a ring of white buttercream around the red ring. Repeat this alternating colours until you reach the outside edge of the cake. Place the next layer of sponge on top and repeat the piping process.
Now you need to apply a crumb coat to the outside and top of your cake. Using your remaining white buttercream, spread around the edges and on the top of your cake using a palette knife. Once all the cake is covered using a clean palette knife scrape the sides and top of the cake to create a smooth finish, some of the sponge should be visible through the buttercream to create the crumb coat effect.
Take your other bowl of buttercream and add the Green Colour Gel, mix until all the colour is evenly distributed.
Slice the back off 7 ice cream cone so that they sit flat against the side of the cake. Place the cones around the side of the cake and the other 3 cones on top of the cake.
Fill a piping bag fitted with a star nozzle with the green buttercream and pipe onto the trees to cover in buttercream and create the tree effect.
Finally finish by dusting the cake with icing sugar so create a snow scene!
RELATED RECIPES
More delicious ideas for you
Seasonal Recipes
Basbousa: Orange, Mango and Cardamon
Seasonal Recipes
Cauldron Cake
Seasonal Recipes
Fortune Cookies