Halloween Monster Meringue Cake Recipe
Recipe Ingredients
Buy the Products
How to Prepare:
Preheat the oven to 180°C (160°C Fan, Gas Mark 4).
Grease your baking tins with a little oil and line the bases with your rounds of baking parchment. Set aside.
Add all the dry ingredients to a large bowl and whisk together.
Add the milk, oil and vanilla extract and whisk again.
Mix the espresso powder into the hot water and then add to the cake mix. Whisk until smooth.
Pour the cake mix into your three cake tins. Use scales to get perfectly even – you’re looking for around 465g per cake.
Place in the oven and bake for 25 mins or until a skewer comes out clean.
Place the butter into the bowl of your mixer and beat so that it’s soft and smooth.
Add the icing sugar in four parts, making sure each addition is fully incorporated before adding more.
Whisk until nice and smooth and then stop the mixer and split the icing into three bowls - one with slightly more buttercream than the rest (this will be the icing for the top of your cake)
Add your gel food colour to each bowl and mix each one thoroughly with a spatula then transfer each colour into its own piping bag. Place your jam in a piping bag.
Once cooled, take one of your cakes and place on a cake stand/board to assemble.
Pipe one colour of buttercream around the perimeter of your bottom layer and pipe another smaller ring in the middle. Fill in the gaps with jam.
Carefully place your second layer of cake on top, pressing down gently but firmly. Repeat the filling with your second colour of buttercream and more jam.
Carefully add your third layer and then cover the top with your chosen colour.
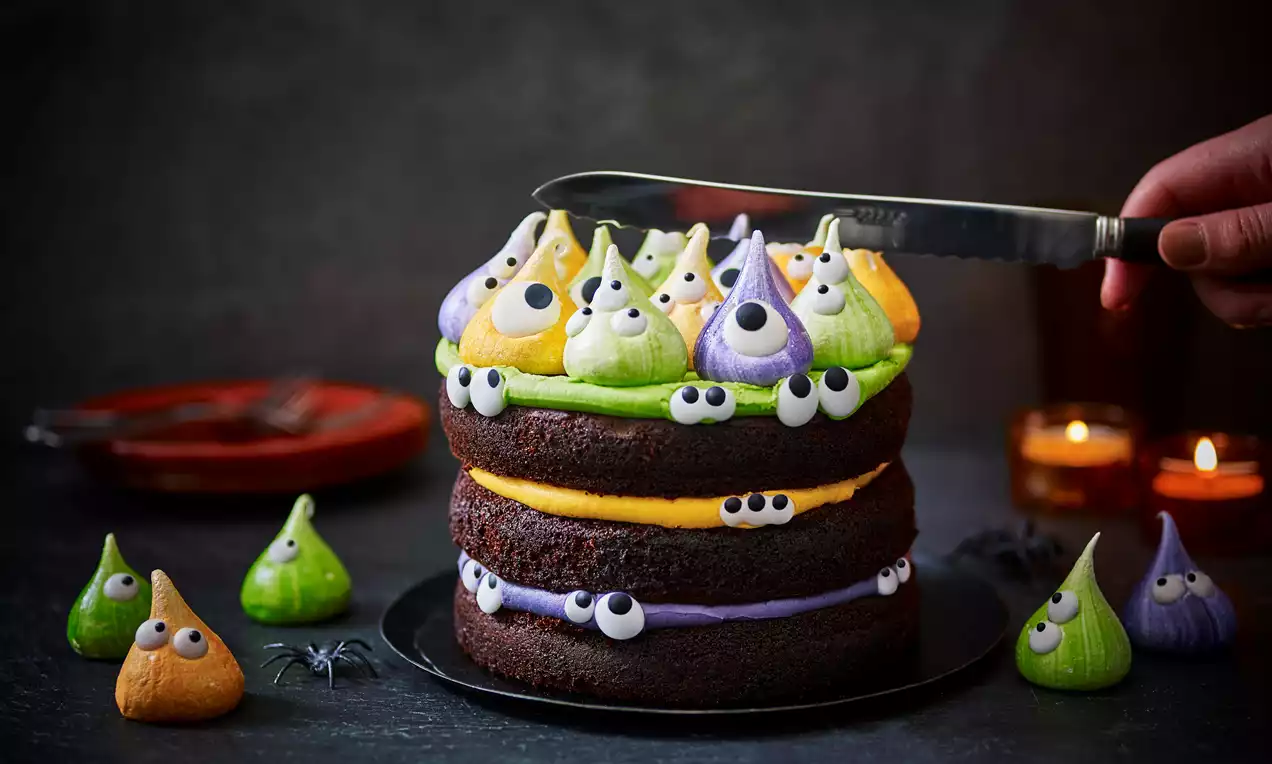
Once the top is covered, decorate with your family of meringue monsters. Follow the recipe for meringue monster below.
Prepare a small tray lined with parchment paper and set aside.
Place royal icing sugar in a bowl and add in 1 teaspoon of water. Mix in until water is incorporated and add another teaspoon of water. Continue to repeat this process until you have a smooth, stiff, pipeable mixture.
Take a spoonful out of your mix and place into another bowl, add black food colouring and continue to add colour gel until it becomes black.
Place the black icing into one piping bag and the white icing into another.
On your prepared tray, pipe different sized white circles. Afterwards, go over each white circle with your black icing to create eyes.
Leave to dry and harden overnight.
Preheat your oven to 200°C (180°C Fan, Gas Mark 6). Line a small baking tray with baking parchment, pour in the caster sugar and heat it in the oven for 7 minutes. Heating the sugar helps to create a glossy, stable mixture.
Pour the egg whites into a mixer and whisk them slowly, allowing small stabilising bubbles to form, then increase the speed until the egg whites form stiff peaks. If you are using egg white powder follow the instructions on the back of the packaging.
Take the sugar out of the oven, and turn oven down to 100°C/ 80°C Fan (leave the door open to help speed this up.) With your mixer on full speed, very slowly spoon the hot sugar into the beaten egg whites, making sure the mixture comes back up to stiff peaks after each addition of sugar. Once you have added all the sugar, continue to whisk on full speed until you have a smooth, stiff and glossy mixture. You should continue to whisk for at least 5 minutes once sugar has incorporated. Feel a bit of the mixture between your fingers; if you can still feel the gritty sugar, keep whisking at full speed until it has dissolved and the mixture is smooth, stiff and glossy.
While your mixture is coming together, turn 3 piping bags inside out and paint the inside with the green, orange, and purple food colour gels.
Divide your meringue mixture into your 3 piping bags and cut the tip off (about a 50 pence size hole). Pipe out your kisses by keeping the bag tight, straight and directly above your baking tray. Squeeze from a 2cm height from the baking tray and then let go before pulling up to form the lovely peaks.
Place your icing eyes onto your kisses and bring them to life.
Bake for about 35-45 minutes or until the meringue bases come off the parchment paper clean.
RELATED RECIPES
More delicious ideas for you

Seasonal Recipes
Gingerbread Cake

Seasonal Recipes
Haunted Biscuit House

Seasonal Recipes
Chocolate and Caramel Sufganiyot