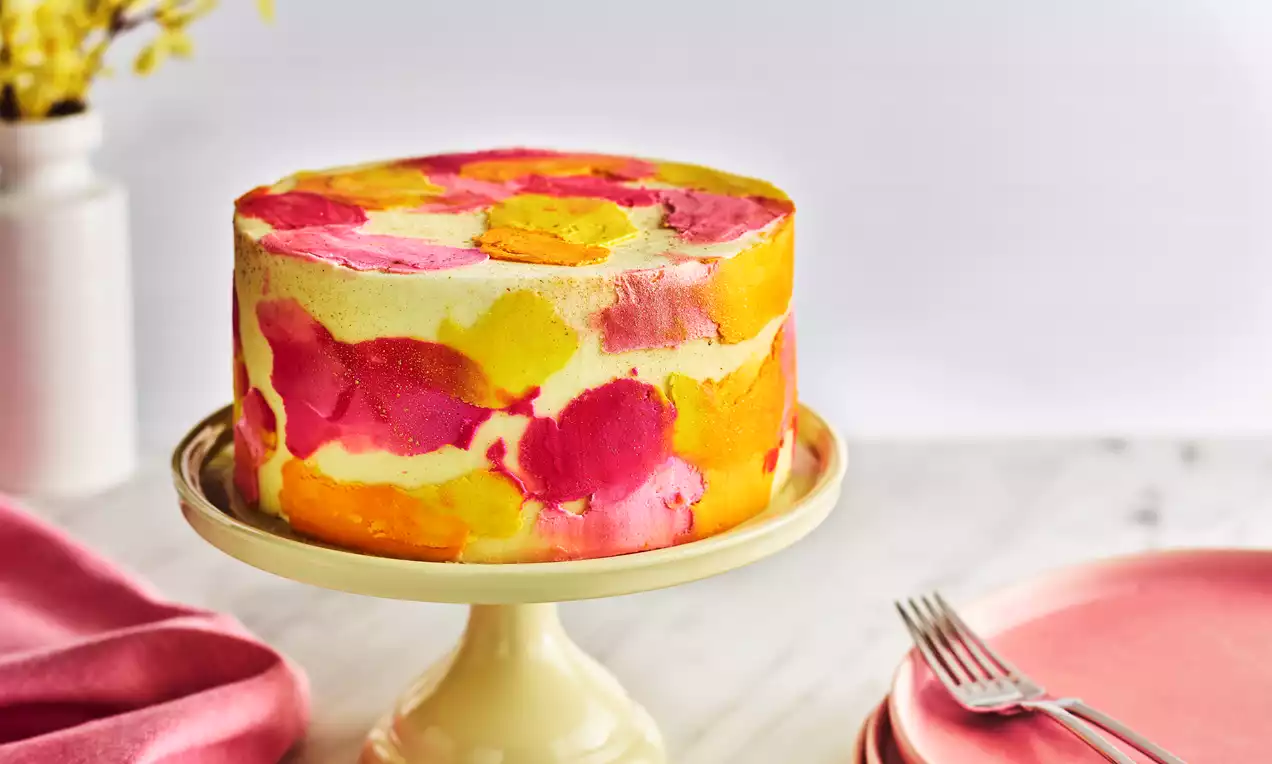
Salted Caramel Watercolour Buttercream Cake
Recipe Ingredients
How to Prepare:
Preheat your over to 180°C/160°C/Gas Mark 4. Grease and line 3 x 8” round cake tins. Place the butter and sugar in a bowl and mix together until creamed and smooth. Mix in the beaten eggs and Caramel Flavour until smooth – if the mixture begins to curdle add a spoonful of flour to the mixture.
Sieve the flour on top of the mixture and fold in, until the flour is well combined – ensure you do not overmix and knock the air out of your mixture.
Divide the mixture between your prepared cake tins and smooth the top of your mixture. Bake the cake for 25 – 30 minutes until a skewer inserted into the centre comes out clean. Once baked leave to cool in the tins for 10 minutes, then remove and leave on a cooling rack to cool completely.
Place the butter in a freestanding mixer bowl and beat until smooth and glossy. Add the icing sugar in 4 intervals, making sure it is fully incorporated after each interval. Once all the icing sugar is added, pour in the Vanilla Extract and beat on a high speed until the buttercream is a smooth and lightly whipped consistency.
Place 30g of buttercream into 4 small bowls. Add a few drops of Pink Colour Gel to one bowl and mix to create a light pink buttercream, repeat with the next bowl add a few more drops of Pink Colour Gel to create a dark pink buttercream. Add Yellow Colour Gel to another bowl and mix and Orange Colour Gel to the final bowl. Cover with cling film to prevent the buttercream drying out and set aside.
Cut the tops off each layer of sponge with a serrated knife to create a flat surface. Place a layer of sponge on your serving plate or cake board. Place the white buttercream in a piping bag and cut a 1cm hole in the end.
Pipe a ring of buttercream onto of the layer of sponge around the edge. Place a couple of spoonfuls of salted caramel sauce onto the sponge and spread out to cover the surface of the sponge, allow the ring of buttercream to act as a barrier and stop any caramel oozing down the sides of the sponge. Once the caramel has been spread on the top of the sponge pipe rings of buttercream onto and smooth with a palette knife to create a flat surface.
Place the next layer of sponge on top of the buttercream and repeat the step above. Repeat until all the sponge layers are sandwiched together.
With the remaining buttercream cover the top and sides of the cake. Use a large palette knife or scraper to achieve a smooth surface. Place the cake in the fridge for 30 minutes to allow the buttercream to set.
Once the buttercream has set, remove the cake from the fridge. Take your bowls of coloured buttercream and using a palette knife gently scrape streaks of coloured buttercream over the top and sides of the cake. You can overlap the colours to allow the colours to merge and also leave some gaps to allow the white buttercream to show through.
Once you have added your coloured buttercream to the cake, take a large palette knife or cake scrapper and run around the edge and top of the cake – do not apply too much pressure as you don’t want to scrape the buttercream off the cake you and smoothing and merging the colours together. Don’t worry about getting a smooth finish on the buttercream, some texture works well.
Allow the coloured buttercream to set and you and ready to serve and enjoy this fun colourful cake!
RELATED RECIPES
More delicious ideas for you
Whole Cake Recipes
Rum Cake
Whole Cake Recipes
Sprinkles Birthday Cake
Whole Cake Recipes
Hot Chocolate Cake