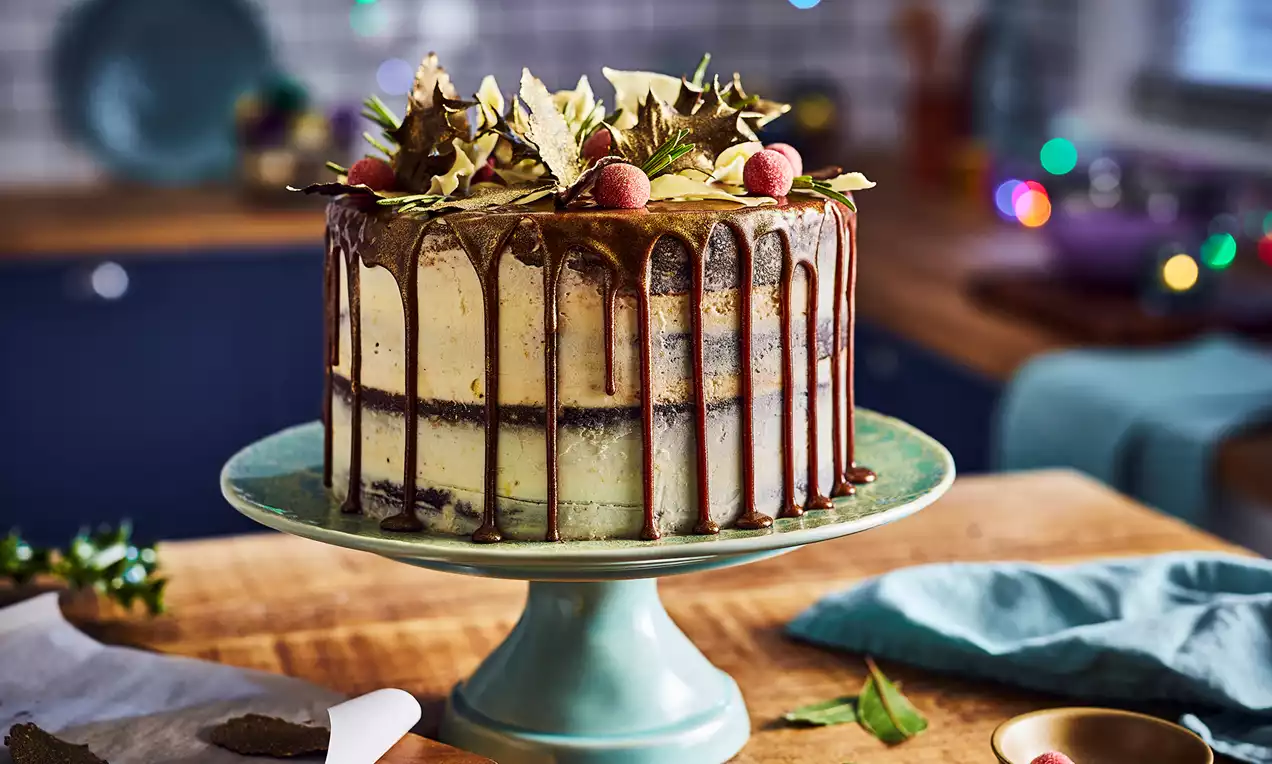
Salted Caramel Chocolate Cake
Recipe Ingredients
How to Prepare:
First thing’s first, preheat your oven to 180°C/160°C/Gas Mark 4 and grease and base line 4 x 7” spring-form cake tins (2 ¾ inch deep). Now we can make a start on this masterpiece! Place the butter, oil, sugar and Vanilla Extract into a large mixing bowl or the bowl of a stand mixer, and beat them all together until pale, smooth and creamy. Gradually beat in the eggs, one at a time, mixing well between each addition.
Sift the flour, Cocoa Powder, Baking Powder, ginger, cinnamon and salt into the bowl and gently fold in the festiveness. Once combined, fold in the milk too, to make a smooth creamy batter.
Divide the mixture between the four cake tins, smooth out the tops and pop into the oven. Bake for 45-50 minutes until risen, firm to the touch and a skewer inserted into the centre comes out nice and clean. Yes, whilst they’re baking you’re definitely going to want to lick the bowl! Once baked, let the cakes have a little cool down in their tins for 10 minutes before removing from the tin. Transfer to a wire rack to cool completely.
Grab your butter and place into a large mixing bowl or the bowl of a freestanding mixer and beat until smooth and glossy. Gradually add the icing sugar a couple of spoonfuls at a time, beating well between each addition to make sure its mixed right in.
Add the Caramel Extract and salt and then you guessed it! Beat again until pale, light and fluffy. Finally, add the milk and beat for a further 2 minutes. This will make it extra fluffy and yummy. Mince pie break anyone?
Place the sugar and water into a saucepan and bring to the boil. Measure out the cream and keep close to hand, along with a whisk, whilst the sugar boils. Keep your eyes on that pan, because once it starts to turn golden brown it’s time to pour in the cream and add the salt. Whisk away to incorporate, but be careful! The sugar will bubble as you do this.
Remove from the heat and allow to cool in the pan. Once it’s cooled, pop 75g of your scrumptiously sticky caramel to the fridge to set. We’re going to use this for filling later! Keep the remaining caramel in the pan for the ganache.
Now we’re really getting into the exciting parts …
Break up the Chocolate into cubes and put your pan of caramel back on the heat until nearly boiling. Once it’s simmering away, add the Chocolate, Glucose Syrup and Caramel Flavouring, remove from the heat and allow to sit for 1 minute. Then, stir it all together and ta-dah! You should have a smooth ganache of dreams. Transfer it all to a piping bag and allow to cool for 10 minutes.
Ok, let’s make this thing look pretty! Melt the Dark Chocolate in a heatproof bowl in the microwave in 20 second bursts, stirring in between, until fully melted. Mastered it? Great! Because now we’re going to do the same again with the white chocolate in a separate bowl.
Line a couple of baking trays with grease-proof or silicone paper and then grab your leaves. Using a pastry brush or paint brush (whichever you prefer) carefully paint a thin layer of chocolate all over each holly and bay leaf. Little tip: If you paint the shiny sides of the leaves the chocolate will be easier to remove later. Once painted, place the leaves onto the paper and pop in the fridge to set.
All set? Then take a deep breath, steady those hands, and let’s get peeling! Begin by loosening the edges before oh so gently peeling the whole leaf away from the chocolate. If your hands get clammy, have a break. We don’t want the chocolate melting between your fingertips! Once peeled, return the chocolate leaves to the fridge until ready to decorate.
To make the berries, place the caster sugar onto a small plate, roll small cranberry sized balls of the red fondant icing and then roll each ball in the caster sugar to create a frosted berry finish. Simple, but effective huh!
Once the cakes have cooled use a serrated knife to cut any dome tops from the cake.
Place your first layer onto a cake board slightly larger than your cake (bigger than 8”.) Pour a third of the caramel onto the top of the cake and spread evenly over the centre. To make your crumb coat even more of a breeze later on, leave a little gap of around 1” all the way around the edge when adding your caramel.
Next add an even layer of buttercream to the cake and smooth to level with a spatula. Add the second layer of cake, repeat the filling process and do the same again for the third. Top with the final layer of sponge.
Now we’re going to spread a really thin layer of buttercream all over the cake to create a crumb coat. Smooth the edges of the cake with a palette knife or cake smoother so the layers of sponge are exposed but very lightly coated in the buttercream. Once your crumbs are all held in place, pop in the fridge to chill and set for an hour. Ahhhhh, time for a cosy cuppa!
Once the crumb coat has set, remove the cake from the fridge. Add a second thin layer of buttercream all over the cake then smooth with a palette knife or cake smoother to tidy up the edges.
Snip the end off the ganache piping bag and pipe the chocolate around the top edge of the cake, piping over the edge at 1cm intervals to create drips that will slowly fall down the side of the cake. Mesmerising, right? Once the edge is coated, pipe the remaining ganache into the centre of the cake and gently smooth out towards the edges.
Carefully take your delicate chocolate leaves from the fridge and give them a light spritz of glitz with the gold lustre. Once you’ve shimmered to your heart’s content, arrange the leaves around the edge of the cake to form a wreath. To hold them in place, gently (we mean really gently!) press them into the ganache so they stand upright.
Next, arrange the rosemary sprigs around the chocolate leaves followed by the frosted berries. You can go uniform and symmetrical or keep it rustic and random, it’s up to you! Add a final spray of gold lustre and there you have it. Your finished masterpiece!
One word … wow! Take a bow, take plenty of pictures, and then take it out to your excited Christmas crowd. Their glowing faces will instantly make all your hard work worth every minute. Especially if served with a similarly spiced mulled wine!
RELATED RECIPES
More delicious ideas for you
Seasonal Recipes
Salted Caramel & Praline ‘Golden Egg’ Trifle
Seasonal Recipes
Snow Scene Christmas Layer Cake
Seasonal Recipes
Easter White Chocolate and Pistachio Cake