Gothic Black Velvet Halloween Cake
Recipe Ingredients
How to Prepare:
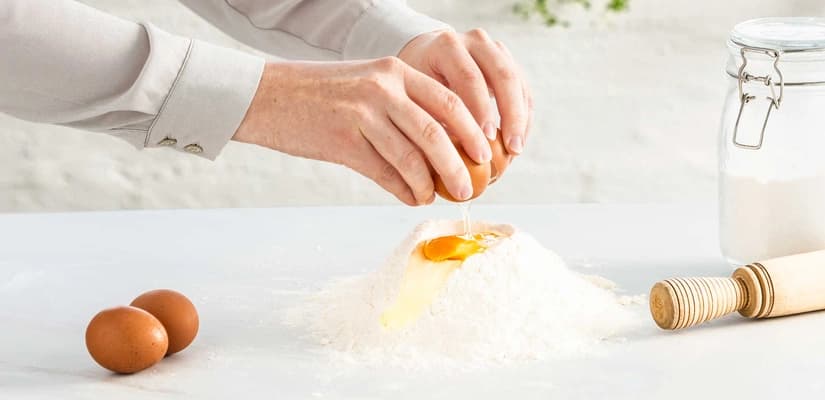
Preheat the oven to 180ºC (160ºC fan oven, 350ºF, gas 4). Grease and line 2 x deep, 15cm (6 inch) round cake tins. Put the margarine and sugar in a bowl and add the eggs.
Sieve the flour, Cocoa and Baking Powder on top. Squeeze in both tubes of Black Food Colour Gel. Using an electric mixer set on a low speed, blend the ingredients together. Increase the speed and whisk for a few seconds until creamy and well blended.
Divide the mixture equally between the prepared tins, smooth the tops and bake for about 50 minutes, until firm to the touch and a skewer inserted into the centre of the cake comes out clean. Cool for 5 minutes then turn the cakes out on to a wire rack to cool completely.
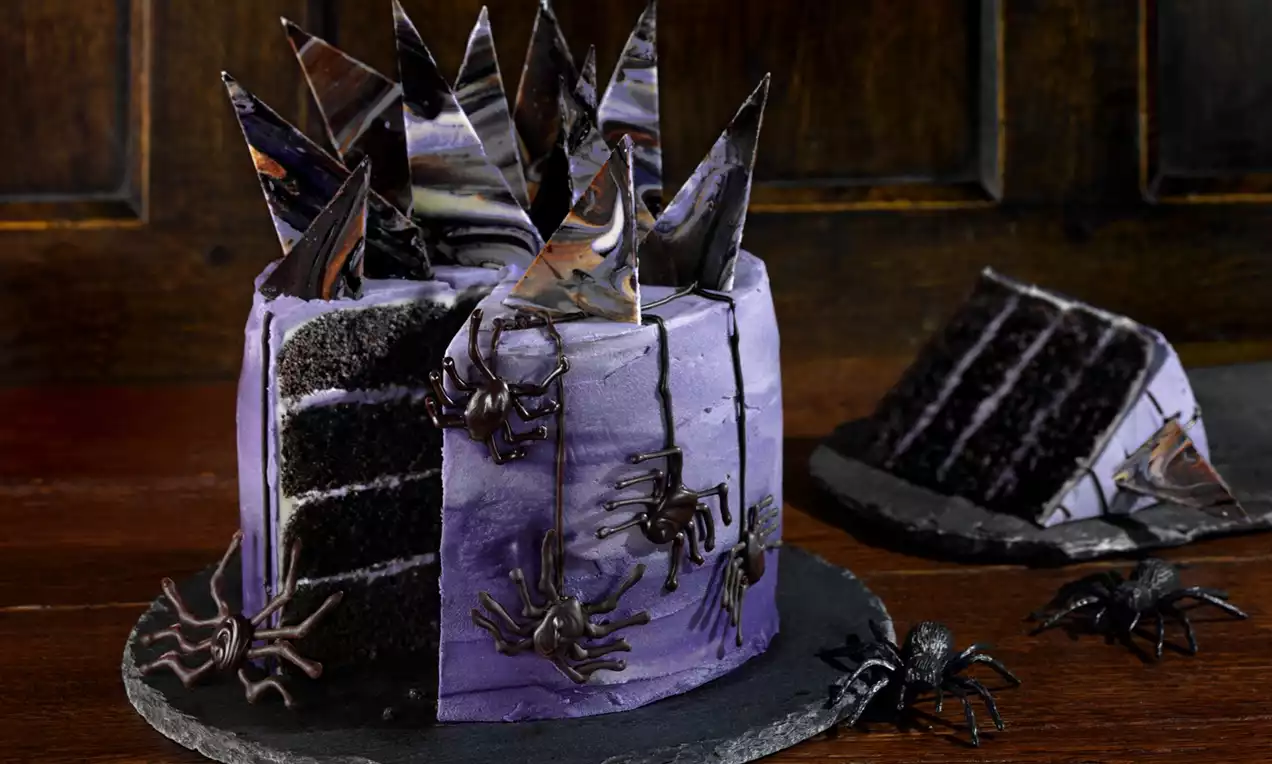
To decorate, line a board with a sheet of parchment. Break up the Extra Dark Chocolate into a heatproof bowl and break and put the White Chocolate in another bowl. Sit both bowls over saucepans of barely simmering water and leave to melt.
Pour half the Extra Dark Chocolate on to the centre of the parchment in a neat pool (sit the remaining melted chocolate back on the saucepan of water to keep warm) and then pour the white chocolate in a pool directly on top.
Drizzle the White Chocolate with a few drops of Violet Food Colour Gel. Working quickly, spread gently using a small palette knife to marble the Gel into the White Chocolate a little to give it Violet streaks, and then marble the White Chocolate into the Extra Dark Chocolate. Tap the board on the work surface to settle the chocolate and make a square approx. 18cm (7 inch). Add a few drops more Violet Gel, if liked, and swirl into the chocolate a little more, tap again and then put in a cool place to set.
Load the remaining melted Extra Dark Chocolate into a small uncut piping bag. Snip off a small point and then pipe sets of 4 pairs of legs on the other lined board. Once you have piped 10-12 sets of legs, pipe a blob in the centre for the body. You may find it easier to trace spider shapes if you don’t feel confident piping free-hand. You will find it easier to pipe any melted chocolate if it is not piping hot; once it cools slightly, it becomes a bit thicker and is easier to control when piping. Once piped, place the spiders in a cool place to set.
Squeeze out the remaining dark chocolate from the bag back into the bowl – you will need to be able to re-melt this once the cake is decorated in order to pipe a web design on top.
Now make up the buttercream icing. Put the butter in a large bowl and beat until smooth. Gradually sieve and mix in the icing sugar to make a smooth, creamy icing. Stir in the Vanilla Extract. If necessary, trim the tops off the cakes to make them flat, then cut both cakes equally through the middle to make 4 layers in total.
Put 225g (8oz) of the icing in a bowl and add 25 drops Violet Food Colour Gel and mix well to make a pale Violet icing. Spread 3 layers of cake with 150g (5oz) of this icing and sandwich all the layers together. Cover and keep the remaining pale Violet icing.
Spread and smooth 150g (5oz) of the uncoloured buttercream round the sides and over the top of the cake to cover it thinly but evenly, making sure the finish is smooth and neat. Running the warmed blade of a palette knife flat against the cake will help you to achieve a smooth effect. Chill the cake for 30 minutes to firm up the icing. This thin covering of icing known as a crumb coat will give you a good base to add the rest of the icing to.
Divide the remaining uncoloured icing between 2 bowls. Add 2.5ml (1/2 tsp) Violet Food Colour Gel to one portion and 15 drops to the other. Mix both portions well, to make a deep Violet shade and a mid-Violet shade.
Once the cake has chilled, spread and smooth the deep Violet icing round the bottom edge of the cake to cover it thinly but completely. Continue spreading the icing to come just about halfway up the side of the cake. Spread the mid-Violet icing round the rest of the cake, spreading it so that it meets and slightly covers the deep Violet icing, and continue spreading up the cake to just below the top edge.
Spread the remaining pale Violet icing smoothly on top of the cake and over the top edge of the cake to meet the mid-Violet icing. Make sure the top edge is smooth and flat. Run the warmed blade of a palette knife flat against the side, around the cake, to help you achieve a smooth, subtly blended effect. Transfer to a serving plate or board. Leave aside in a cool place to firm.
To finish the cake, re-melt the reserved Extra Dark Chocolate, cool for 10 minutes then place in another small uncut piping bag. Snip off a small point and carefully pipe concentric circles over the top of the cake to reach the middle. Pipe varying lengths of chocolate down the sides of the cake at intervals to make web drops for the chocolate spiders. Leave in a cool place for a few minutes to set.
Carefully peel the spiders from the parchment and stick on to the web drops using a little dab of melted chocolate. Use any remaining spiders to decorate the serving plate or board.
Break up the marbled chocolate square into random shards and stick into the top of the cake at vertical angles. If you want to make sharper points, let the chocolate square stand at room temperature for a few minutes; this way you should be able to cut more pointed angles using a sharp knife.
Carefully press the shards into the top of the cake, so that they stand upright. Your stunning, Gothic-style cake is now ready to serve and impress!
RELATED RECIPES
More delicious ideas for you
Christmas Chocolate Shard Cake
Halloween Rice Krispie Treats
Mirror Glaze Chocolate and Raspberry Bombe
Halloween Drip Cake
Easter Bunny Cream Tarte
Halloween Bat Loaf Cake Recipe
Christmas Macaron Wreath